Introduction
This tutorial describes how to create a vendor account in Smartwerks. Accounts should be set up for any person or company that will be billing you for goods and/or services provided. (e.g. Utility Companies, Credit Card Companies, Landlord, etc.)
Step-by-Step
- Select A/P > A/P Vendor Maintenance from the top menu.
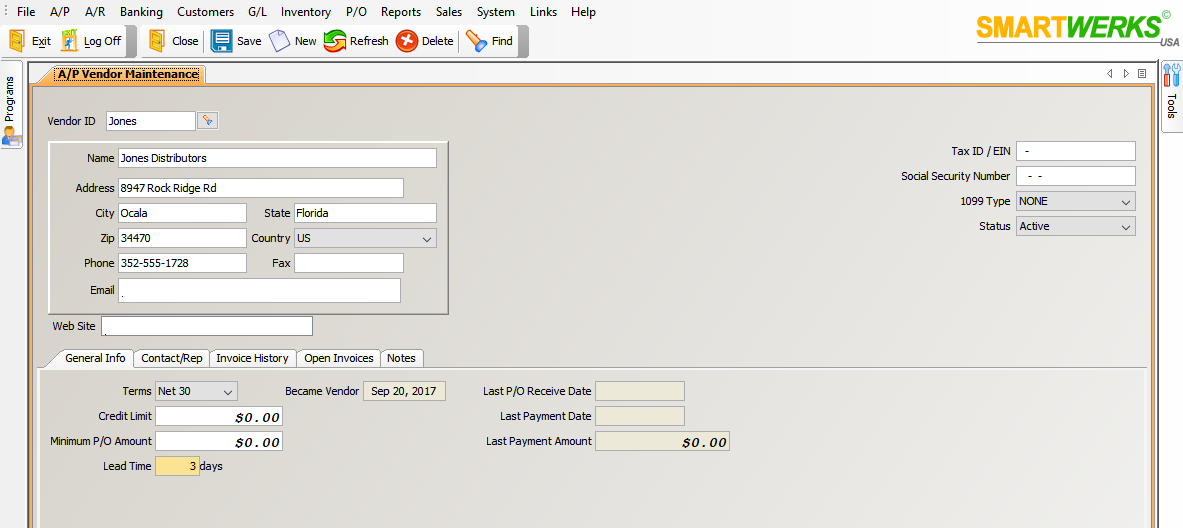
Click image to enlarge.
- Click the New button in the toolbar.
- In the Vendor ID field, enter unique ID for the vendor. It can be a maximum of six digits and should give you an idea of who the vendor is.
- Enter the Name and Address information for the vendor.
- The Vendor’s Tax ID/Employee Identification Number and Social Security Number (if that is being used for tax reporting) are optional. Entry in one of these fields is only required if you need to issue this vendor a ‘1099’ form at the end of the year.
- In the 1099 Type field, select Misc if a 1099 will be required for this vendor. Otherwise, choose None.
- When you create a vendor, the status defaults to Active. If you no longer want to use this vendor and have no open invoices or P/O’s for it, you can change the status to Inactive and no more P/O’s or invoices can be entered for this vendor.
- Enter the vendor’s Email Address and/or Website if desired.
- Select the Terms for this vendor. Terms are created in System > Payment Terms.
- Enter a Credit Limit, Minimum P/O Amount and Lead Time. If the credit limit is exceeded or the minimum P/O amount is not met, a message will display in the Purchase Order Entry screen to let the buyer know, but it will not prevent you from completing the P/O.
- Click the Save button in the toolbar to retain the changes.