Introduction
Take With/Carryout sales are used when a customer is taking the merchandise with them today.
To process a sale without collecting customer information, you can use the Express option. However, we recommend collecting customer information whenever possible.
Smartwerks tracks customer purchases and this information allows you to determine your target market and analyze your customers’ buying habits. Additionally, contact information is stored in the customer directory, which can be used for marketing campaigns and to offer a more personalized experience for your customers.
Step-by-Step
- Select Sales > Sales Orders from the top menu.
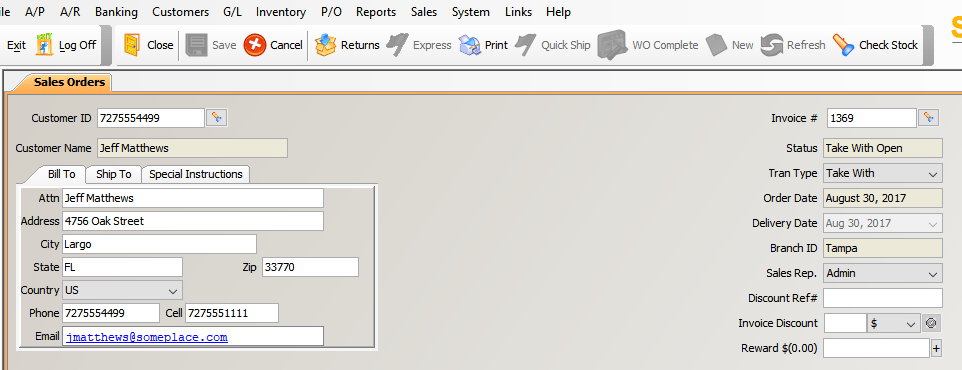
Enter the Customer ID (customer number).
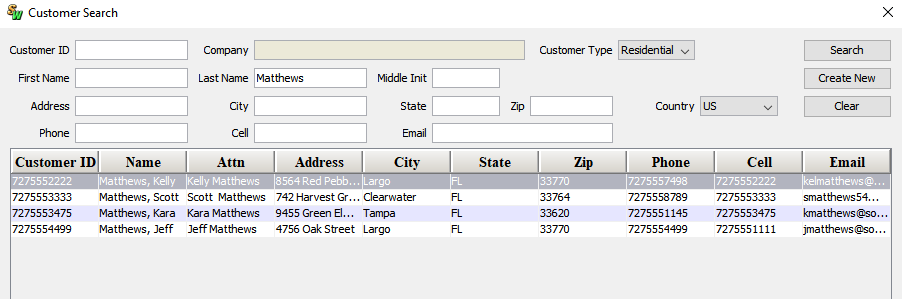
If you don’t know the Customer ID, click the search button (flashlight) to the right of the field. When the search window appears, enter information about the customer in at least one field, and click Search. Matching customers then display. Double-click the correct one to select it for the transaction. If your company is using Smartwerks Rewards, the system will ask if the customer wants to join the Rewards program.
- The customer information appears on the transaction. Make any necessary changes.NOTE: If the Bill To information is changed, after clicking the Checkout button, you will be asked if the Ship To address should be the same as the Bill To address. Click Yes and both addresses will be updated in Customer Maintenance. Click No and only the Bill To information will be updated.
- On the Special Instructions tab, enter any required notes for the transaction. These instructions print on the full invoice, but not the mini invoice.
- From the Tran Type drop-down list, select Take With.
- In the Sales Rep field, select the employee processing this sale.NOTE: Changing the Sales Rep does not modify security permissions. It is only used to credit the sale to the correct employee and for reporting purposes.
- To add a discount to the entire invoice, enter it in the Invoice Discount field. Then specify whether the discount is flat dollar amount or a percentage discount. Click the green check mark button to apply the discount.NOTE: If you don’t have permission to apply a discount (based on security settings), you must obtain approval from somebody who does.NOTE: If your company has a system for keeping track of discounts, you can enter a reference in the Discount Ref # field (e.g. the reason for the discount, the person giving the discount) to help you easily identify the discount at a later time. This is an optional step.
To remove the discount, click the Discount: $ button in the Totals section of the screen. Then from the invoice discount window, highlight the discount you want to delete and click the Remove button.
- If the customer has earned rewards, all or part of the amount can be applied to the transaction using in the Reward $ field. Enter the amount to apply and then click the add button to the right of the field.

- Scan or enter the Item Number or click the search button to look one up. The item information displays.NOTE: You can edit the item’s price and description on this screen and any changes are applied to this sale only.
- If the item is flagged for serial number tracking in Inventory Maintenance, enter the item’s serial number in the Serial # field.
- In the Qty field, enter the quantity being purchased (the defaults is ‘1’). If you are using a barcode scanner, you can program it to enter a quantity of “1” and automatically move on to the next item.
- The quantity available in your branch displays in parentheses next to your Branch ID in the Quantity Available.
- If there is no quantity available in your branch, you will receive a message regarding committed or unavailable stock. If the sale would result in a negative on-hand quantity, you will not be able to complete the Take With sale unless the preference allowing sales of negative quantities is checked.
- Stock levels for all quantities in all locations can be checked by clicking on the Check Stock button in the toolbar.
NOTE: If you are selling a gift card or an item that requires a serial number, the quantity will be “1” and cannot be changed (since each quantity of the item requires a separate gift card or serial number). If the customer wants to purchase more than one of this item, enter it again on a separate line.
- If you need to apply a discount to the item, enter it in the Discount field. From the drop-down menu to the right, specify whether the discount is flat dollar amount or a percentage discount.
- The Line Total field automatically displays the discounted price. The amount of the discount will print on the invoice.
- As with the Invoice Discount, you must have security permissions to apply the invoice.
NOTE: If the item you are selling is a gift card/certificate, you will not be able to apply a line item discount unless you have chosen this option in the System Settings screen.
- If the customer is flagged as taxable in Customer Maintenance, the Taxable box is automatically checked. Uncheck the box if the item should not be taxed.
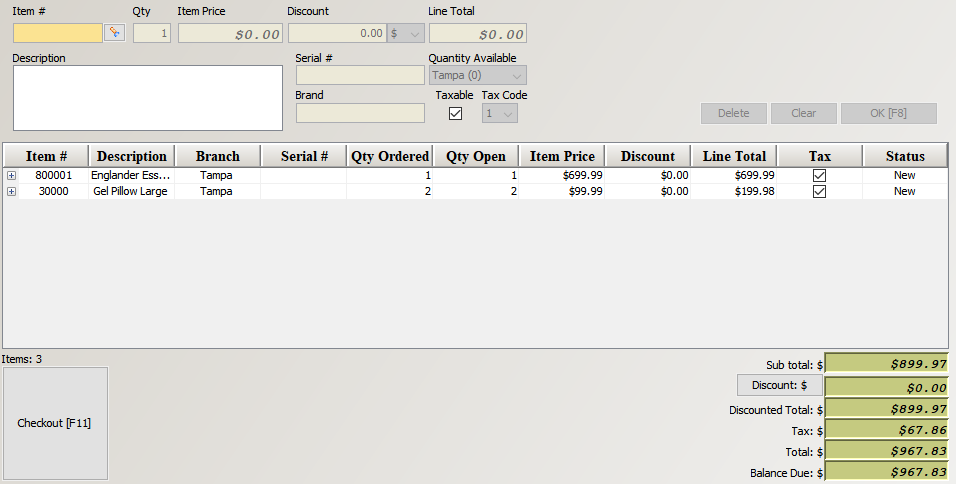
- When all of the item information is correct, click OK. The item appears below.
- To delete an item, highlight it and click the Delete button.
- To edit an item, highlight it, make the necessary changes, and click Update.
- Repeat steps 9-15 until all items are added to the transaction.
- Click Checkout.
- To cancel an order before checkout is complete, click the Cancel button in the toolbar.
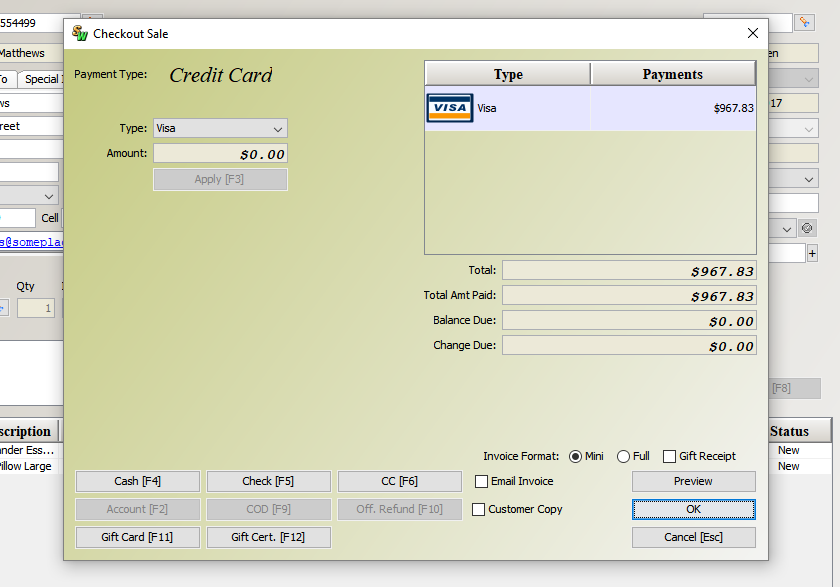
- Select the payment type for the transaction. You can split payment among multiple payment types if necessary. Valid payment types are:
- Cash
- Check
- A/R Account
- CC (Credit Card)
- Gift Card
- Gift Certificate
- Enter the amount being applied for this payment type.
- Enter any required information for the payment type and click Apply.
- Provide change to the customer, if necessary.
- Specify whether to print a Mini Receipt, Full Receipt, or Gift Receipt.
- Check the Email Invoice box to send a digital receipt to the customer.
- Click Ok to complete the transaction and print the invoice.