Introduction
This tutorial describes how to create an Inventory item in Smartwerks. A new item is added on the Inventory Maintenance screen, which is also used to edit existing items, check your stock levels, and view transaction history, serial numbers, and item movement histories.
Step-by-Step
- Select Inventory > Inventory Maintenance from the top menu.
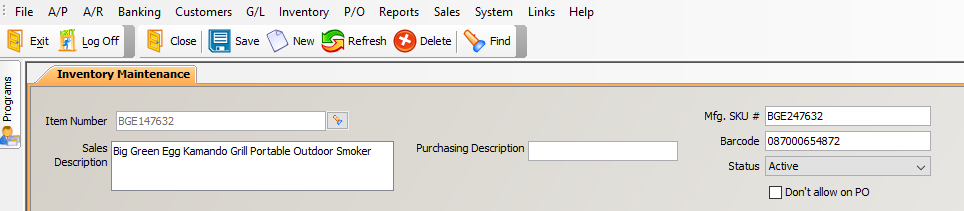
Click image to enlarge.
- Click the New button.
- Enter a unique Item Number and press Enter on your keyboard. We recommend using the MFG SKU# or the Barcode for the item number.
- In the Sales Description field, enter a description of the item. This description will print on the invoice.
- If your vendors require an item description that is different from the sales description, enter it in the Purchasing Description field.
- Enter the MFG SKU#. This is the vendor’s part number and is a required field.
- Enter the Barcode for the item, including all leading zeros. This field is required if you are using a barcode scanner and is limited to 12 characters.
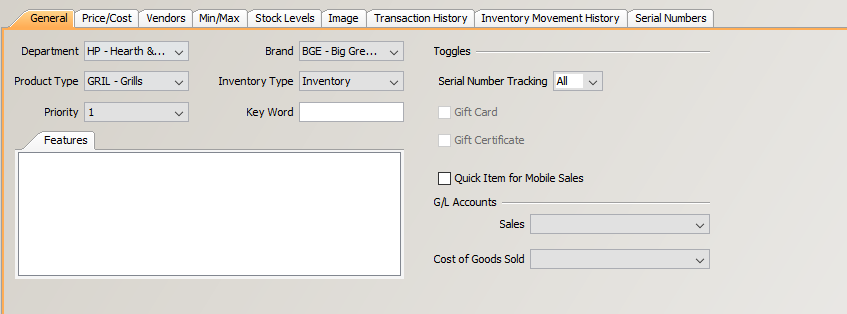
NOTE: The next three fields are an extremely effective way to categorize your products and they add useful filters to Smartwerks search and reporting features.
Click image to enlarge.
- Select the Department for the item or select New from the list to create a new department.
- To view descriptions for each existing department, access Inventory > Department Maintenance.
- Specify the item’s Brand or select New from the list to create a new brand.
- To view descriptions for each brand, access Inventory > Brand Maintenance.
- Select the Product Type for the item or select New from the list to create a new product type.
- To view descriptions for each existing department, access Inventory > Product Type Maintenance.
- Specify whether the item is an Inventory or Non-Inventory item:
Inventory Item:
- Purchased from a vendor and has a specific cost per unit when received into inventory.
- On Hand, Available, Committed, and On Order quantities are tracked and reported.
- A retail store purchases this item to sell to its customers.
- Delivery of this item generates Revenue and Cost of Goods Sold entries in the General Ledger.
Non-Inventory Item:
- An intangible entity such as Labor, Installation, or Support.
- Has no cost directly associated with it. The expense portion of the transaction comes from Payroll or Accounts Payable.
- No quantities are associated with it.
- The delivery of the item creates a Revenue entry, but does not generate an Cost of Goods Sold entry in the General Ledger.
NOTE:
- For a Non-Inventory item, you are required to choose a G/L Sales Account to post to at the time of sale finalization. No G/L Cost of Good Sold account is required because Non-Inventory items have no direct cost associated with them.
- For an Inventory item, G/L account selections are not required because Cost of Goods Sold and Sales G/L account numbers are set in System Settings.
- Select a Priority for the item (optional). Valid entries are 1-5, with 1 being the highest priority. This meaning of this field is defined by your company. For example, a priority of 1 could indicate that you would like to keep this item in stock at all times.
- Enter a Key Word for item (optional), which is used in conjunction with the Advanced Item Search. For example, if the item is a washing machine, you might enter “washer” in this field.
- From the Serial Number Tracking drop down menu, choose:
- None – For no serial number tracking.
- Sale – To require the entry of a serial number for this item on the Sales Orders screen.
- All – Requires the entry of a serial number for each quantity being:
- Received on the P/O Receiving and Quick Receive screens.
- Adjusted in or out on the Inventory Adjustment screen.
- Transferred in or out on the Inventory Transfer screen.
- Sold on the Sales Orders screen.
- If desired, enter information about the item’s features in the Features box.
- Click the Price/Cost tab.
- Prices can be adjusted at any time. The cost is entered when the item is created, then updated automatically by Smartwerks each time the item is received on a P/O.
Click image to enlarge.
- Enter the cost of the item in the Cost field. Once the item has been sold or purchased through Smartwerks, this field is locked, and the system will update your cost each time you receive this item. Non-Inventory items have no direct cost, resulting in this field always being locked.
- Enter the MSRP (Manufacturer’s Suggested Retail Price). Since this field is used to calculate the price when the % of MSRP calculation method is selected, it is required for all inventory items.
- In the Price 1 row, select a price calculation method from the drop-down list and then enter the corresponding value in the field to the left.
- Fixed – With this method, the price does not change. For example, if you want the price of the item to always be $819.00, select this option from the drop-down list and enter $819.00 in field to the left.
- GM % – With this method, the system calculates the price based on a desired gross margin. For example, if you want to attain a gross margin of 40%, select this option from the drop-down list, and enter ’40’ in the field to the left.
- % of MSRP – With this method, the system calculates the price based on a percentage of the MSRP. For example, if you want the price to be 80% of the MSRP select this option from the drop-down list and enter ’80’ in the field to the left. Note that this percentage can exceed 100%.
- % Mark Up/Cost – With this option, the system calculates the price on a percentage markup from the item’s average weighted cost. For example, if you want the price to be 45% higher than the cost, select this option from the drop-down list and enter ’45’ in field to the left. The price will be updated if a P/O for this item is received with a different cost.
- % Markup/Last PO Cost – With this option, the system calculates the price based on a percentage markup from the item’s last purchase order cost. For example, if you want the price to be 35% higher than the last purchase order cost, select this option from the drop-down list and enter ’35’ in field to the left. The price will be updated if a P/O for this item is received with a different cost.
The Price Level 2 and Price Level 3 are alternate pricing options for this item and are set up the same as Price Level 1. If you are not using alternate pricing, leave these rows set to ‘$0.00’. Remember that the default price level for each customer is Price 1, and can be changed on the Preferences tab of Customer Maintenance.
NOTE:
- When you have selected the price calculations, the actual prices for the items appear on the Price/Cost screen, along with the gross margin percentage.
- If you choose ‘Fixed’ pricing, you will be able to change the price on the ‘P/O Entry’ screen, and the price updates as soon as the P/O is saved.
- If the salesperson will earn a spiff for sale of this item (in addition to or instead of a commission), enter the dollar amount in the Spiff field. Earned spiffs appear on the Commission Report.
- Specify whether the item is Taxable, Non-Taxable, or Non-Taxable for a certain date range.

Click image to enlarge.
- If desired, enter the minimum and maximum stock levels for each branch on Min/Max tab. If levels are set up here, they will take precedent over the Min/Max levels set for the item’s brand and/or product type in System Settings.NOTE: If you set Min/Max stock levels by brand or product type, you will not see that information here.
Click image to enlarge.
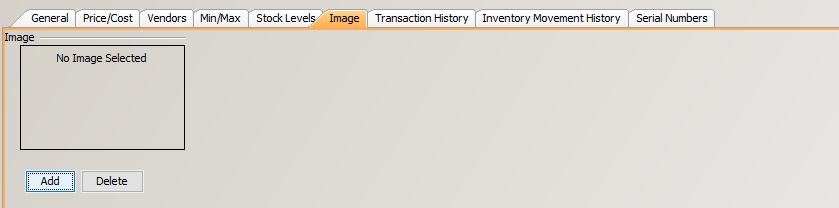
- If you want to add an image of the product, click the Image tab.
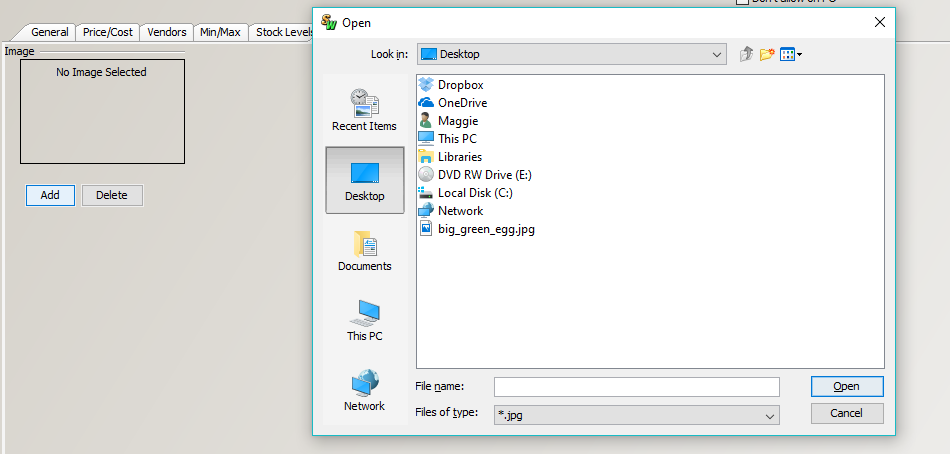
Click image to enlarge.
- Click Edit, select a product photo from your computer, and click Open. This image will display on the sales screen when the item is sold.NOTE: For best results, the image should be a .jpg or .gif.
- Click the Save button in the toolbar to retain your changes.