Introduction
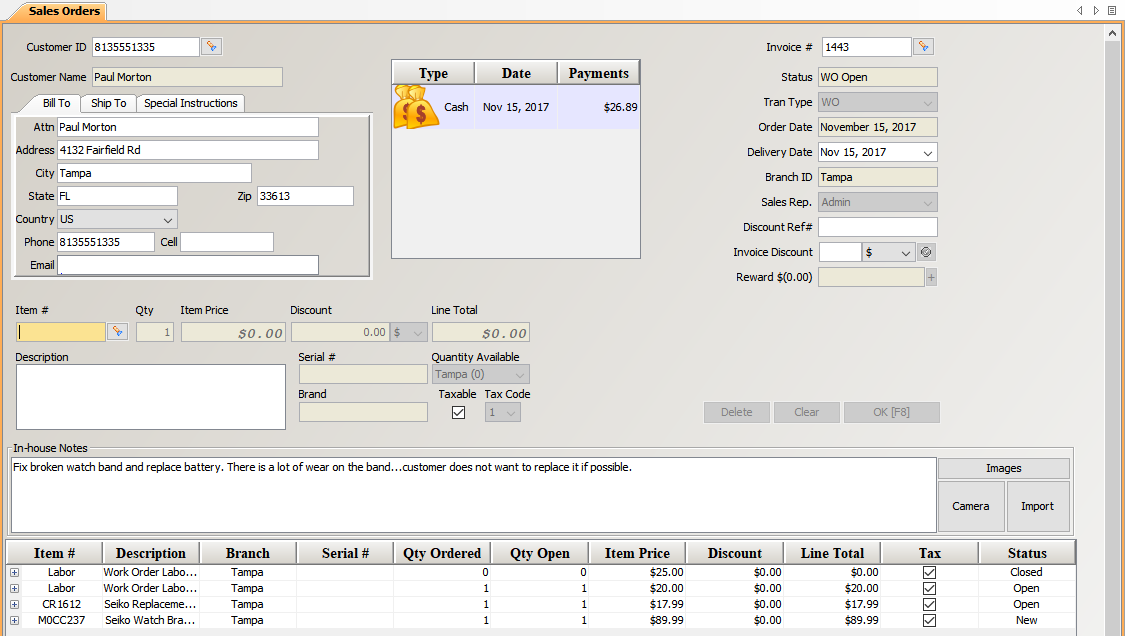
Work Order transactions are used when repairing item(s) for a customer. They are entered on the Sales Order screen, similar to a Delivery Order. The status of a work order is ‘Open’ until all quantities are delivered or canceled. The status then changes to ‘Closed’ (when the WO Complete button is clicked).
NOTE: You cannot use the Express Sale option for Work Orders.
Article Contents
Creating a Work Order
This tutorial describes how to create a Work Order in Smartwerks. Once this process is complete, the Work Order is considered ‘Open.’
- Select Sales > Sales Orders from the top menu.
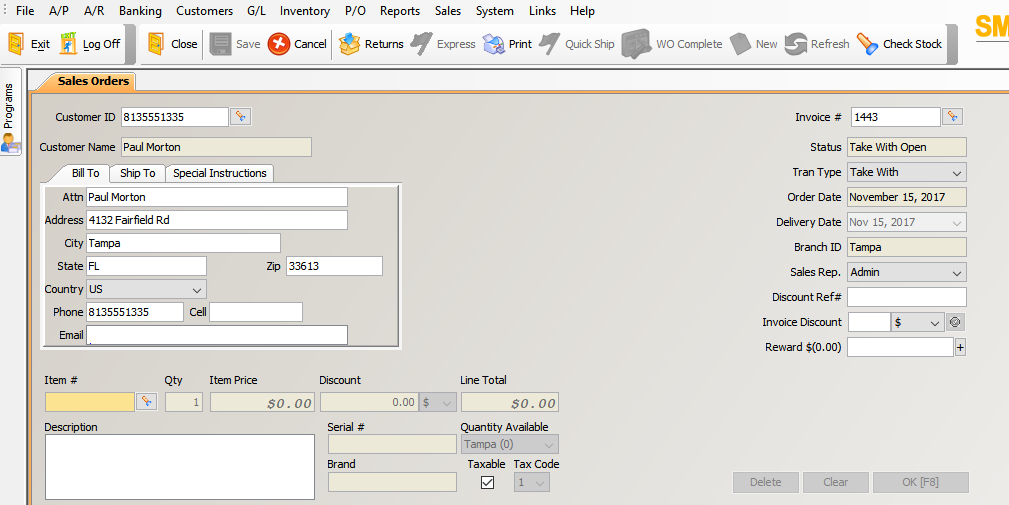
- Enter the Customer ID (customer number).
If you don’t know the Customer ID or want to create a new one, click the search button (flashlight) to the right of the field. When the search window appears, enter as much information about the customer as you know, and click Search. Matching customers then display. Double-click the correct one to select it for the transaction. If you are using Smartwerks Rewards, the system will ask if the customer wants to join the Rewards program.
To create a new customer, enter the customer information and clicking Create New.
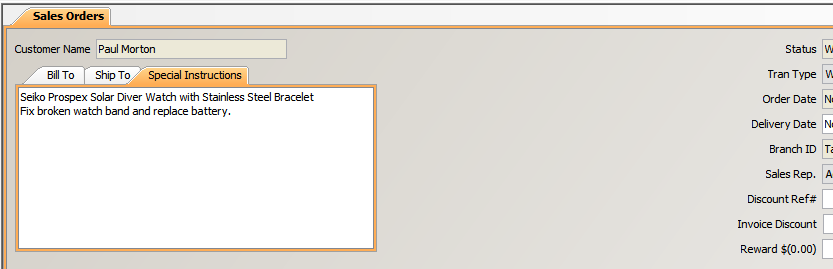
- On the Special Instructions tab, enter a brief description of the item for identification purposes. You might also want to enter a description of the repair (problem, estimated time of completion, etc.)
- This information prints on full invoices, but not mini invoices.
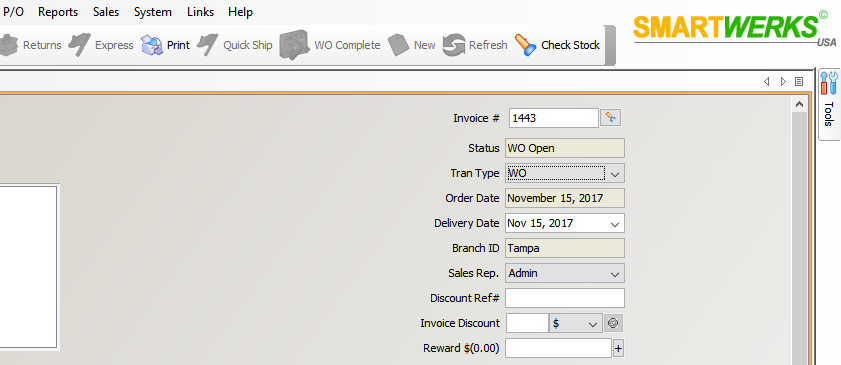
- From the Tran Type drop-down list, select WO.
- From the Sales Rep. drop-down menu, select the employee creating this workorder.NOTE: Changing the Sales Rep. does not change any security permissions. It only changes the employee who gets credit for the sale.
- Choose a Delivery Date. This is the day you expect this Work Order to be complete.
- To add a discount to the entire invoice, enter it in the Invoice Discount field. Then specify whether the discount is flat dollar amount or a percentage discount. Click the green check mark button to apply the discount.
- If you don’t have permission to apply a discount (based on security settings), you must obtain approval from somebody who does.
- If your company has a system for keeping track of discounts, you can enter a reference in the Discount Ref # field (e.g. the reason for the discount, the person giving the discount) to help you easily identify the discount at a later time. This is an optional step.
To remove the discount, click the Discount: $ button in the Totals section of the screen. Then from the invoice discount window, highlight the discount you want to delete and click the Remove button.

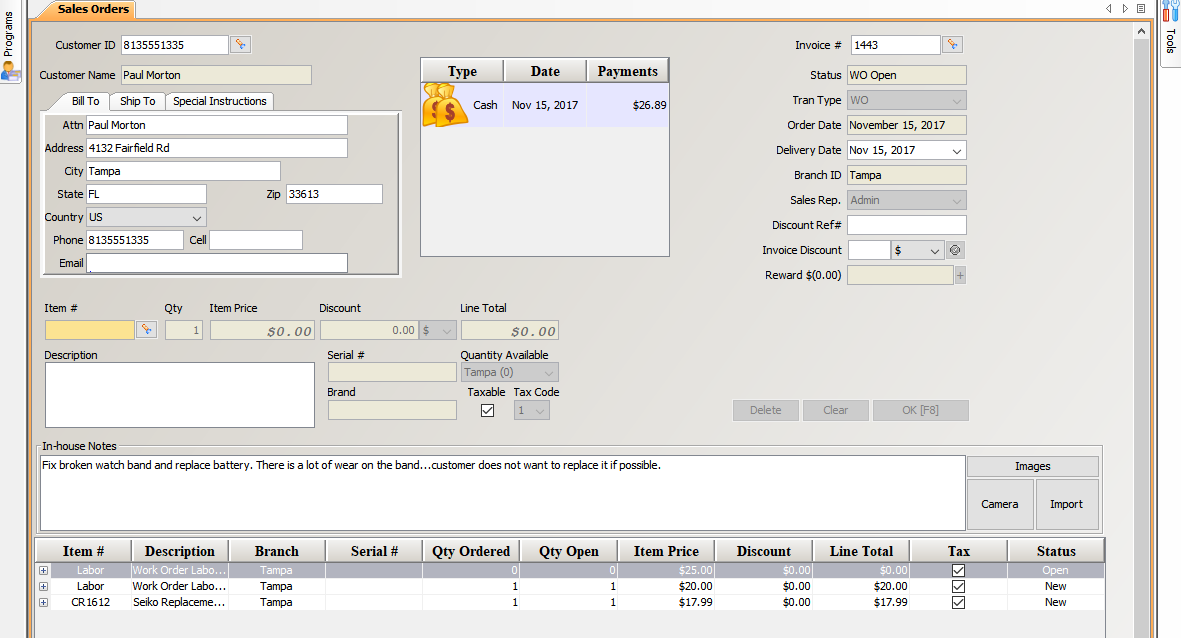
- Work Orders have an In-House Notes field. This field is used to enter instructions for the work order and attach images to assist with the repair. For example, you can enter “Fix broken watch band and replace battery” and attach a photo of the broken watch band. These notes appear on the Sales Orders screen, but do not print on the invoice.
- To attach an image directly from a webcam, click the Camera button. Click Take Picture to capture the image from the webcam. Click OK to save the photo to the work order.
- To attach an image from a file on your computer, click the Import button. Select the image from its location on your computer and click Open. Click OK to save the photo to the work order.

- In the Item Number field, enter a labor item or part (inventory item) that is required for the repair. At least one item must be entered at this time.
- For Work Orders, we recommend creating a Non-Inventory item called ‘Labor’ that will be used to charge and track the repair labor on a work order.
- The entered labor and/or parts charges are not final and can be changed at a later time.
- Enter the Quantity for the entered labor or part. In the case of a labor item, the quantity will represent the amount of labor (30 minutes, 1 hour, etc.).
- If you need to apply a discount to the item, enter it in the Discount field. From the drop-down menu to the right, specify whether the discount is flat dollar amount or a percentage discount.
- Once the labor and/or parts information has been entered, click the OK button.
- To delete an item, highlight it and click the Delete.
- To edit an item, highlight it, make the necessary changes, and click the Update button.
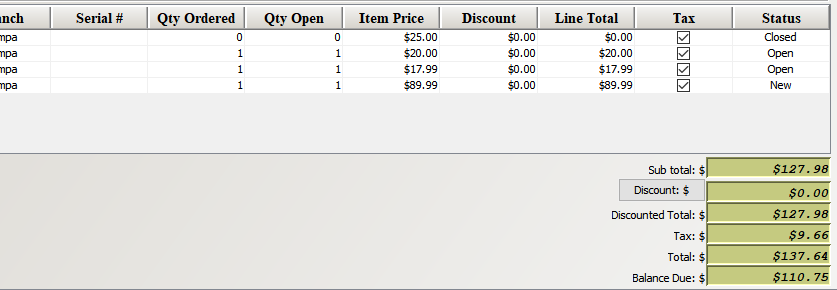
- When all item have been entered, click Checkout. The Checkout window opens.
- Click the Cancel button at the top of the screen to void this transaction before you checkout.
- Select a Payment Type for the work order. If the customer will be picking up the item at a later time, select COD.
- Accept or change the pre-prompted Amount and click Apply. The payment appears on the right side of the window.
- When all payments have been applied, click Ok.
- You might want to print two copies of the invoice: one for the customer and one to attach to the item.
- At this point, the work order is saved in the system and it can be edited if necessary. When the repair is finished, you will need to complete the work order as described in the Completing a Work Order tutorial.
Editing a Work Order
This tutorial describes how to edit an open work order. You can add or delete items, change the delivery date and instructions, or cancel an entire work order. You cannot change the quantity, price, or discount for an item. In order to make those changes, you will need to cancel the item (using the Cancel button at the top of the screen) and then re-enter it with the correct quantity, price, and/or discount.
- Select Sales > Sales Orders from the top menu.
- In the Invoice field, enter the invoice number of the work order being edited. If you don’t know the invoice number, click the search button to the right of the field.
- Make any necessary changes to the work order.
- When finished, click Save at the top of the screen. If the changes cause the Balance Due field to change, click the Checkout button to complete the checkout process. Select COD if the customer will be paying later.
Completing a Work Order
This tutorial describes how to complete an open work order. In Smartwerks, a work order remains open until it is completed. With an open work order, you can add or cancel items, change the delivery date and instructions, or cancel the entire order. You cannot change the quantity, price, or discount for an item. In order to make those changes, you will need to cancel the item (using the Cancel button at the top of the screen) and then re-enter it with the correct quantity, price, and/or discount.
Once the work order is completed, no more changes can be made to it.
- Select Sales > Sales Orders from the top menu.
- In the Invoice field, enter the invoice number of the work order being completed. If you don’t know the invoice number, click the search button to the right of the field.
- The work order opens. Make any necessary changes.
- If there is a balance due (e.g. COD was entered as the payment type), the customer must pay it in full (on the Checkout window) before the work order can be completed.

- When all payment has been collected and you are ready to close the work order, click the WO Complete button in the toolbar.
- A window opens asking if you want to complete this Work Order. Click No and the work order will remain open. Click Yes and the following occurs:
- Any items will be reduced from your inventory’s quantity on hand and G/L postings will be made.
- The status of the Work Order will change to ‘Closed.’
- You have the option to preview, email, and/or print the invoice again.